06.16.20
Blueshift Insights – Customizable Dashboards
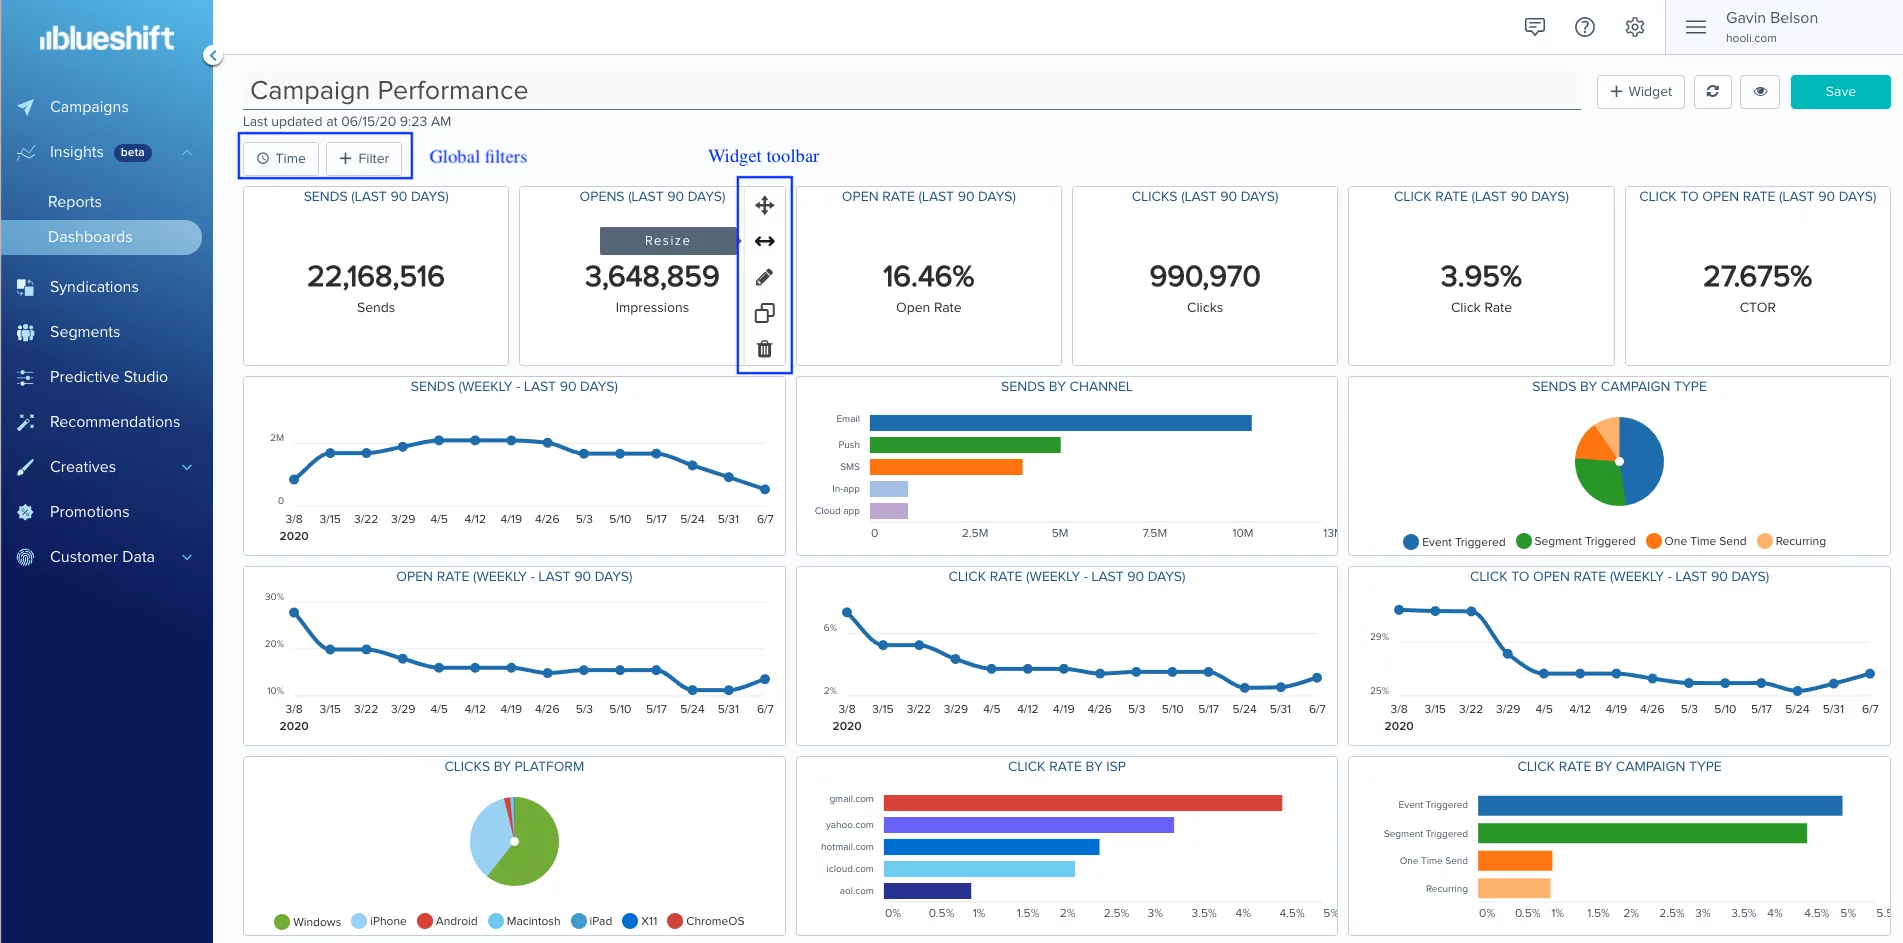
With the Insights dashboard feature, you can now create custom dashboards, each containing a variety of charts and tables. This will allow you to get a quick, high-level visual summary of the performance of your marketing initiatives.
You can access this feature from the Insights → Dashboards menu on the left navigation panel. Each tile on the dashboard is called a ‘widget’. You can add charts, tables and even notes to a dashboard via the ‘+ Widget’ button. Charts and tables can be pulled in from reports you previously created. If you don’t have an existing report, you can also create one directly from the dashboard.
You have full control over the content and layout of your dashboard. When you hover over a widget (on the dashboard edit screen), you will notice a tool bar to its right. You can use the options on this tool bar to choose the right size for your widget and also drag and drop it to any location on the dashboard. You can also edit the widget to update its name or the table or chart in it. You can copy a widget as well as delete it. All changes to your dashboard are auto saved. So you don’t need to worry about losing your changes if you accidentally leave the dashboard edit screen.
Your dashboard can have multiple charts, each having different timelines and different sets of campaigns. For example you could have monthly sends data from 2019 on one widget and compare it to monthly sends data from 2020 on another widget. Or you could compare the click rate for campaigns in Los Angeles to that for campaigns in San Francisco. On the other hand, you can also impose a global timeline and/or campaign filters for all widgets on a dashboard. For example, if a dashboard has multiple charts – sends, opens, open rate etc, you can apply a global time filter (e.g. last 90 days) so that you can ensure that the data in all the widgets are from the same time period and thus eliminate any chance of comparing apples to oranges.
06.16.20
Blueshift Insights – Customizable Dashboards
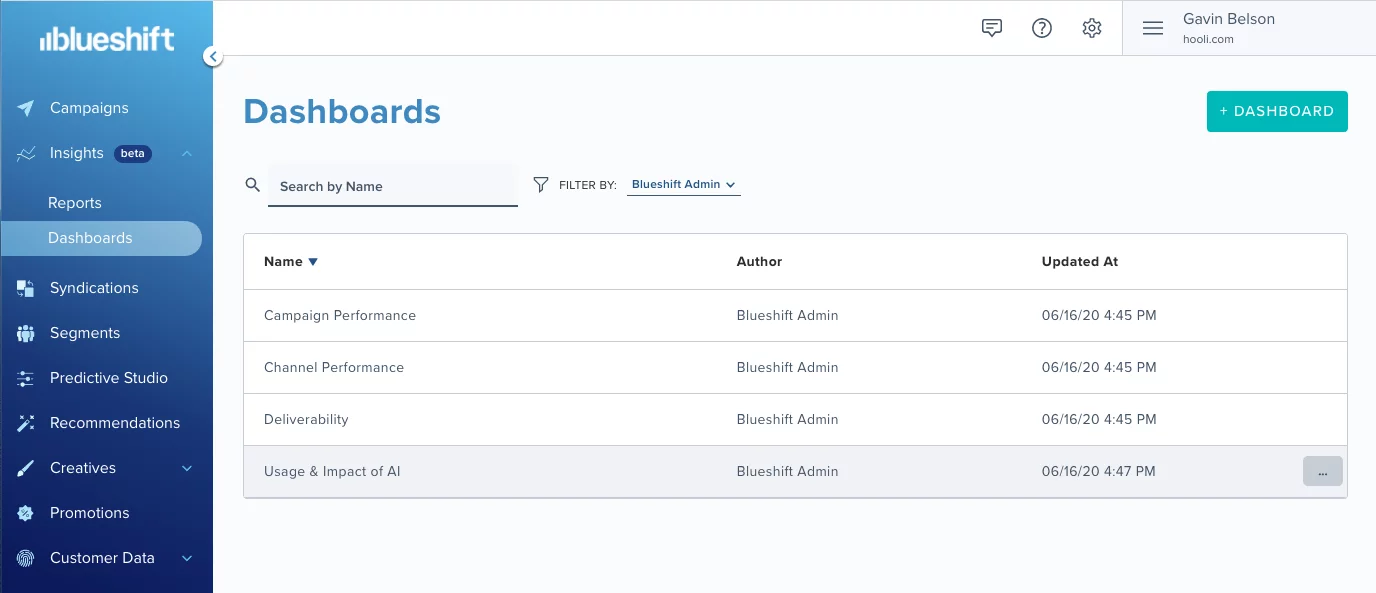
Your account will come loaded with 4 default dashboards (author = Blueshift Admin) that you can use as an inspiration for your dashboards.
06.16.20
Multiple Mobile App Support
You can now manage multiple mobile apps from within one account. This feature allows you to have a shared user base across all your apps. You can build segments based on user activity across different apps and then send a push or in-app message via a specific app. For example if you have an email app ‘A’ and a calendar app ‘B’, you can choose to send a notification only to app A even if a user has installed both apps A and B on their phone.
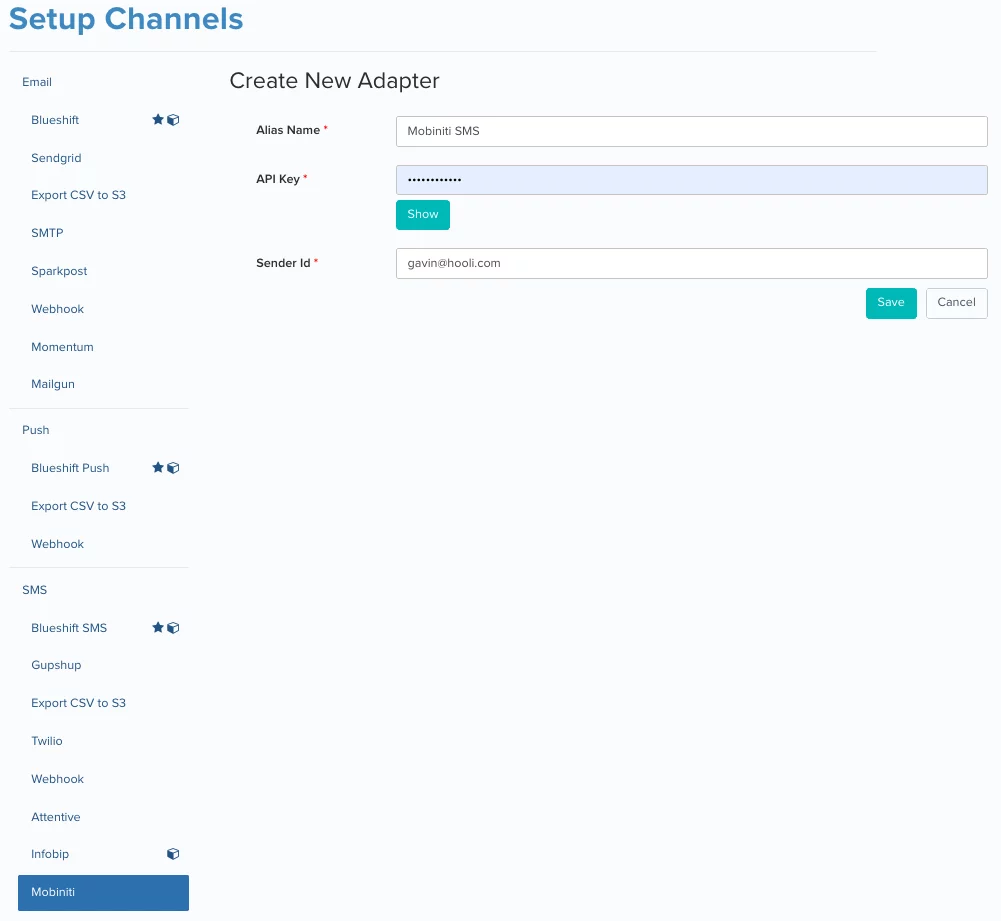
Step 1: In order to support push and in-app notifications to multiple apps that a user might have installed on the same device, you will first need to create an adapter for each mobile app your brand owns.
Step 2: You would then need to specify the unique package name for your Android app and unique bundle ID for your iOS app.
For steps 1 and 2, you can refer to the channel adapter enhancements we rolled out on 06.02.20.
Step 3: Then, once you create your push (or in-app) message content, you can preview it for and test send it to a specific app. For example, in the push studio, you can select the preview app using the ‘Preview For’ drop down.
Step 4: Finally, in the campaign journey editor, you can specify the app you want to send the push (or in-app) message to. You will need to select ‘Blueshift Push’ as the ‘Push Message Adapter’ and then you can choose the adapter corresponding to the app (step 1) from the ‘Alias Name’ drop down. When you select a specific app, Blueshift will send the message to all devices where the user has installed that app AND has opted in for notifications.
n addition to selecting a specific app, you can choose the default option i.e. to send the message to the most recently used app. In such a situation, Blueshift will determine the app a user accessed last and then send the message to all devices where the user has installed that app AND has opted in for notifications.

06.16.20
Mobiniti Connector for SMS
We have added support for a new SMS provider, Mobiniti. With this integration, you now have five native SMS providers to choose from – Twilio, Attentive, Infobip, Mobiniti and Gupshup.
This integration allows you to not only send SMS messages directly from the Blueshift platform but also to automatically sync users’ notification preferences (i.e. unsubscribes and subscribes) with Mobiniti.
06.16.20
OneSignal Connector for Web Push
We have enhanced the OneSignal connector to support messaging activity tracking and attribution. Now you can track impressions and clicks for web push and other notifications sent via OneSignal using Blueshift. All you have to do is provide our webhook URL as part of the configuration in OneSignal. Once you do so, Blueshift will add tracking parameters to every message sent via the OneSignal connector and will receive the impression and click activity data from Onesignal via the webhook.
06.16.20
‘Group By’ Enhancements in Reports
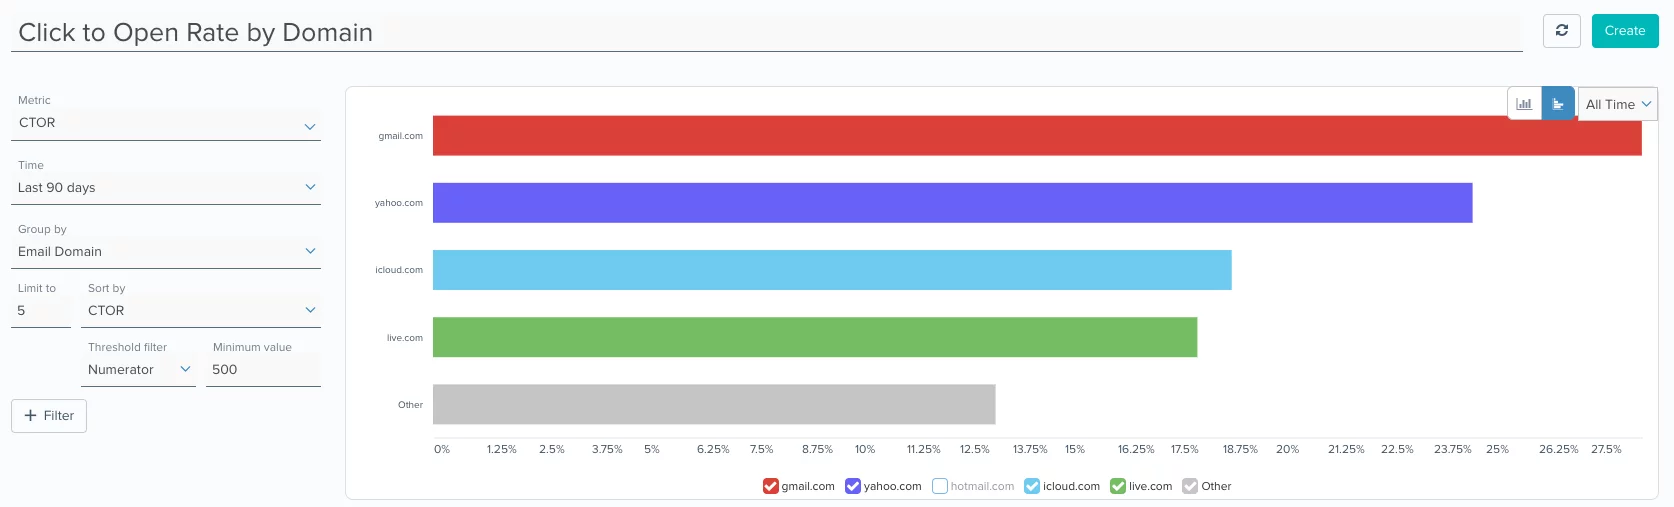
When you use ‘group by’ for a compound metric, you will now have the option to determine how you want the results sorted – via numerator, denominator or by the actual compound metric. If you select the compound metric, you will also have the option to filter out outliers by setting thresholds for numerator and denominator. For example, if you want to find the ESPs with the highest click rate (= clicks/ sends) for your campaigns, you can choose to sort the results by the compound metric (= click rate in this case) and ignore any ESP to which you sent fewer than 1000 emails (i.e. denominator < 1000). In addition, if you have a result which is far higher (or lower) than the rest, you can toggle it on/ off from the chart so that you can zoom in on the rest of the results. For example, in the above analysis, hotmail.com had a click rate greater than 90% and the rest of the domains had a click rate between 10% and 12%, you could hide hotmail.com from the chart using the appropriate check box in the chart legend so that the subtle differences in click rates among the other domains are more obvious.
06.16.20
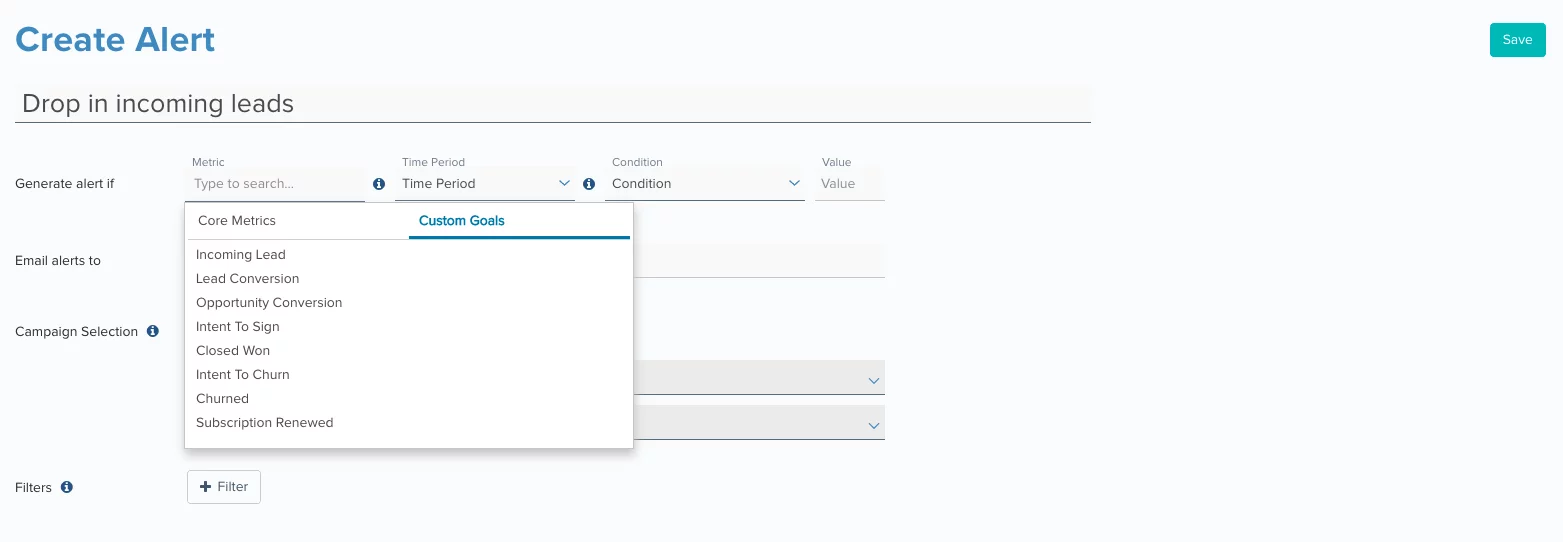
Custom Goals in Campaign Alerts
In addition to standard metrics like sends, opens, clicks, open rate etc., you can now use custom goals for monitoring campaign performance. So for example, if you have a custom goal called ‘app installs’, you can set up an alert to notify you if ‘app installs’ driven by a specific set of campaigns fall below a certain number.
06.02.20
Blueshift Deep Links
Blueshift Deep Links allow you to leverage iOS Universal Links and Android App Links.
With Blueshift Deep Links you can ensure that whenever a user clicks on any link in your marketing campaign, they get the best experience for the platform they access the content from. So for example, if a user accesses the content on their Android device, clicking on the link would open up the specific page in your Android app. Similarly if the user accesses the content on their iOS device, clicking on the link would open up the specific page in your iOS app. And if the user accesses the content on another platform (for example their laptop), clicking on the link would open up the specific page on a web browser.
Blueshift Deep Links work on all channels – email, SMS, cloud apps, push and in-app. In addition, they pack in the full power of click tracking and custom goal attribution that are standard to the Blueshift platform. So you can rest assured that your users will always get the best experience independent of the channel you use to reach out to them. And you will continue to have full visibility into their actions so that you can make your campaigns more engaging and relevant for your users.
Please note that your mobile developers will need to upgrade the SDK (to Blueshift Android SDK v3.1.0 and/ or Blueshift iOS SDK v2.1.0) to enable this feature. In addition, they will need to write up the logic to map URLs to specific destinations in your app for this feature to work. To learn more about how to do this, please refer to our iOS and Android developer guides.
Please also note that your users will need to update their app before this feature starts working for them.

06.02.20
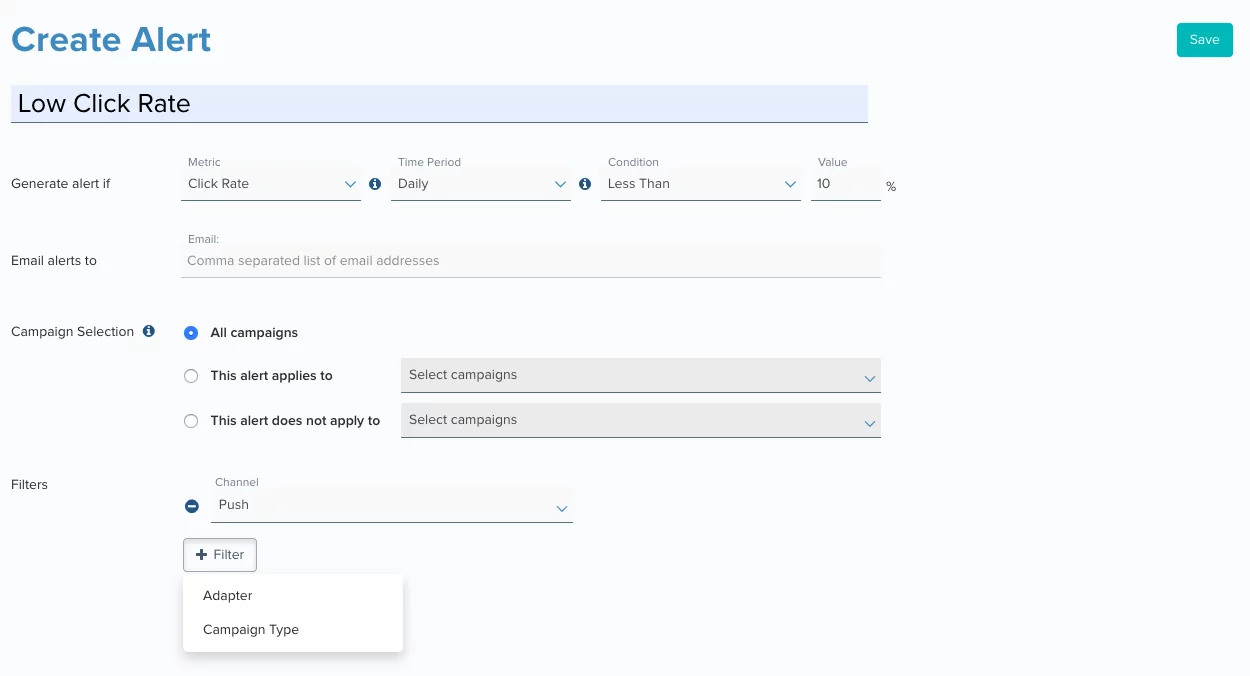
Campaign Filters For Alert Configuration
It will now be possible to narrow down the list of campaigns you want to evaluate for the alert criteria using filters for channels used, campaign type and the send adapters. For example, if you want different thresholds for acceptable open rates for push campaigns versus email campaigns, you can now do so using a channel filter on the alert create/ edit screen.
06.02.20
Channel Adapter Enhancements
We have separated the adapter list view from the detail view. Instead of seeing a long list of configurations for different adapters on a single screen, you will now see a table with a list of all the adapters (aliases). You will be able to add a new adapter on the adapter index/ list screen as well as click on any adapter to edit the adapter configuration. These changes will make the job of finding and updating adapter configurations much easier if you have configured multiple adapters in your account.
06.02.20
Channel Adapter Enhancements
In addition to the above enhancements (which are available for all channels), we have also made specific enhancements to the push adapter configuration screen. You will now need to provide the unique package name for your Android app and the unique bundle ID for your iOS app.
